

How to Get Crema with AeroPress: 7 Steps That Work
Table of Contents
- What You'll Need Before You Start
- AeroPress Espresso Recipe for Maximum Crema
- AeroPress Metal Filter vs Paper Filter: Which Builds More Crema?
- Best Coffee Beans for Crema in an AeroPress
- Inverted Method vs Standard Method for Crema
- Troubleshooting: Why Your AeroPress Crema Isn't Showing Up
- Conclusion
- Frequently Asked Questions
Last Updated: September 29, 2026
What You'll Need Before You Start
Real crema from an AeroPress is possible, but it takes the right setup and a little technique. According to the Specialty Coffee Association's brewing standards, the golden layer on top of a good shot is mostly tiny bubbles of carbon dioxide and coffee oils. Fresh beans hold more of that gas. Stale beans have already let it go.
Here's what to gather before your first attempt:
- AeroPress and its plunger
- Burr grinder (a blade grinder won't give you a consistent fine grind)
- Kitchen scale that reads in grams
- Thermometer or a kettle with temperature control
- Fresh dark roast beans, ground just before brewing
- Metal filter (more on this below)
- Sturdy mug that fits the AeroPress base
AeroPress Espresso Recipe for Maximum Crema
The best AeroPress espresso recipe for crema uses a fine grind, water just off the boil, and steady pressure for a short, concentrated shot with a thick, golden top.
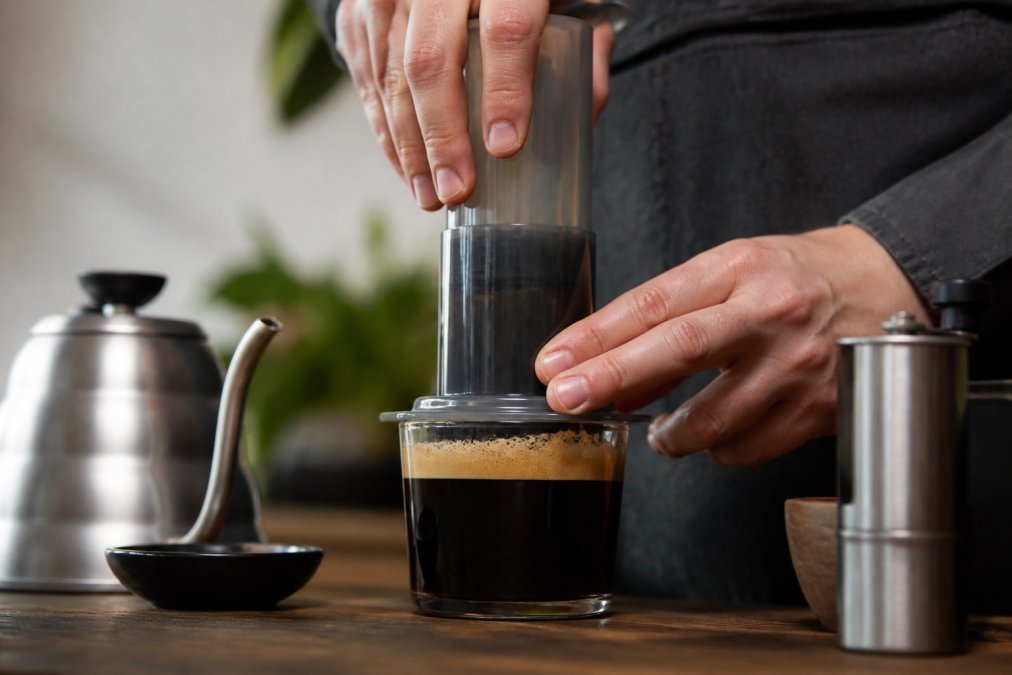
Grind Size and Water Temperature
Grind size decides how much resistance your coffee bed gives the water. Too coarse and water rushes through; too fine and you'll fight the plunger. Aim for fine table salt, a touch coarser than espresso powder.
Step-by-Step Brewing Instructions
- Heat water to 200°F.
- Weigh out 18 grams of coffee.
- Grind fine, like table salt.
- Set the AeroPress in the standard position over your mug.
- Add coffee and shake gently to level the bed.
- Pour 30 grams of water and stir for 10 seconds. This is the bloom, when carbon dioxide escapes.
- Wait 30 seconds, then pour another 60 grams of water.
- Stir three times, then insert the plunger to seal.
- Press down slowly over 20-30 seconds. Stop at the hiss.
- Let the shot rest for 10 seconds before you look at the crema.
That rest period matters: crema builds as the shot settles, and stirring right away breaks the bubbles before they form.
AeroPress Metal Filter vs Paper Filter: Which Builds More Crema?
The metal filter wins for crema, hands down. Paper traps the oils and fine particles that make the foam; metal lets more of both through, giving a thicker, richer top and more body. Paper gives a cleaner, brighter taste with less sediment.
| Filter Type | Crema | Body | Cleanliness |
|---|---|---|---|
| Metal | More | Full | Some sediment |
| Paper | Less | Lighter | Very clean |
| Both stacked | Medium | Balanced | Clean |
Why the Filter Changes the Foam
Crema is an emulsion: carbon dioxide bubbles cling to coffee oils and tiny particles. A paper filter's fibers catch most oils and sub-100-micron particles, so bubbles collapse faster. A metal filter's wider perforations let more oil and fines through, giving the foam more scaffolding. Filter choice changes crema more than almost any variable except bean freshness, it isn't adding gas, it's deciding how much material the gas can grab.
Grind Size: What "Fine" Actually Looks Like
- Coarse (sea salt): water rushes through, no resistance, no crema. This is French press territory.
- Medium (table salt): works for drip, too loose for an AeroPress shot.
- Fine (powdered sugar): the target zone for crema. It should clump slightly when you pinch it and hold a soft shape.
- Espresso-fine (flour): too fine for most AeroPress plungers. You will fight the press and risk channeling.
Stacking Filters: The Middle Path
Stacking a metal filter under a paper filter is the compromise most home brewers land on. The metal disc supports the paper so it doesn't tear, and the paper catches the finest grit. You lose some oil versus metal alone but keep more than paper alone.
Best Coffee Beans for Crema in an AeroPress
The best coffee beans for crema are fresh, dark-roasted, and ground right before brewing. Dark roasts carry more oils to the surface, and those oils feed the foam. Fresh beans still hold carbon dioxide from roasting, the gas that forms the bubbles.
For an AeroPress, look for:
- Dark or medium-dark roasts with visible oil on the bean
- A roast date on the bag, not just a "best by" date
- Whole beans you grind yourself
- Single-origin or blends built for espresso
Inverted Method vs Standard Method for Crema
The inverted method gives you more control, which usually means more crema. In the standard method, some water drips through before you're ready; the inverted method flips the AeroPress so the coffee stays put until you press.
Pressure-Enhancing Accessories That Help
A few add-ons can push your crema further:
- A fine metal filter lets more oils through than paper
- A flow-control cap slows the plunge for steadier pressure
- A sturdy, narrow mug keeps the shot from splashing and breaking the foam
- A dosing funnel keeps your coffee bed level for even extraction
None of these are required. A basic AeroPress, fresh beans, and good technique will get you most of the way; accessories just make the result easier to repeat. Get your grind and pressure right first, then add accessories for consistency.
Troubleshooting: Why Your AeroPress Crema Isn't Showing Up
No crema usually comes down to one of five problems. Work through them in order, and you'll find the fix fast.
| Problem | Likely Cause | Fix |
|---|---|---|
| No foam at all | Stale beans | Buy freshly roasted beans |
| Thin, watery top | Grind too coarse | Grind finer |
| Bitter, flat shot | Water too hot | Lower to 195-200°F |
| Plunger fights back | Grind too fine | Go one step coarser |
| Foam fades fast | Paper filter only | Switch to metal |
The Chemistry Behind the Failure
Most troubleshooting guides tell you what to change without telling you why. The why matters, because it tells you which variable to touch first.
- Not enough gas points to stale beans, water that is too cool to drive the release, or a grind so coarse the water passes through before it can extract.
- Nothing to hold the gas points to a paper filter stripping the oils, too little coffee in the bed, or a plunge so fast the emulsion never forms.
A Diagnostic Order That Saves Beans
Work top to bottom. Each step assumes the one above it is correct, so you're not changing three variables at once.
- Check the roast date. If the bag has no roast date, or the date is more than four to six weeks old, that is your problem. Stop here and get fresh beans. Nothing downstream will fix stale coffee.
- Check your grind against the visual reference above. If your grounds look like table salt, go finer. If they look like flour, go coarser.
- Check your water temperature. If you are pouring straight off a boil into a dark roast, you are likely scorching it. Let the kettle sit a minute, or use a thermometer and target 195-205°F.
- Check your dose. Below roughly 15 grams, the bed is too thin to build resistance. Most crema-focused recipes land between 15 and 20 grams.
- Check your plunge speed. If you are finishing the press in under 15 seconds, you are pushing liquid through faster than the emulsion can form. Aim for 20-30 seconds of steady pressure.
- Check your filter. Only after the five steps above are dialed in should you blame the paper filter. Swapping to metal on stale beans will not produce crema.
The Pressure Ceiling Nobody Mentions
Here's the part most guides skip: an AeroPress cannot reach espresso pressure. A true espresso machine pushes water through the puck at roughly nine bars; a hand-pressed AeroPress generates a fraction of that, and pushing harder channels water around the bed instead of through it.
A few more things to watch:
- Don't skip the bloom. That first pour and stir lets gas escape before the main brew, so the gas that remains has a better chance of forming foam instead of just venting.
- Press slowly. Rushing the plunge breaks the foam before it forms.
- Use enough coffee. Too little grounds means too little resistance and no pressure.
- Drink it fresh. Crema fades within a minute or two. That's normal, even in a coffee shop.
Conclusion
Chasing crema with an AeroPress is a game of small details: fresh beans, a fine grind, water at the right temperature, and a slow, steady press. Nail those four, and that golden layer shows up more often than not.
Frequently Asked Questions
Can you actually get crema from an AeroPress?
Yes, but it's not true espresso crema. AeroPress crema is a foam layer created by trapped carbon dioxide and coffee oils, not the pressurized emulsification you get from a real espresso machine. With the right grind size, water temperature, and a slow plunge, you can build a visible, espresso-style layer on top of your cup. It won't match a commercial machine, but it looks and tastes convincing enough for most home brewers.
Does a metal filter help create more crema than a paper filter?
A metal filter lets more coffee oils and fine particles pass through, which adds body and helps the foam layer hold together longer. Paper filters trap most of those oils, giving you a cleaner cup but a thinner crema. If crema is your goal, the AeroPress metal filter vs paper filter choice matters: go with metal. You can also stack a paper filter on top of a metal one to balance clarity and foam.
What grind size works best for an AeroPress espresso recipe?
Use a fine grind, close to what you'd use for a moka pot or slightly coarser than true espresso. Too coarse and water rushes through without building pressure or extracting enough oils. Too fine and you'll clog the filter and stall the plunge. Aim for a grind that creates firm resistance when you press down, taking about 20 to 30 seconds for the full plunge. Adjust one notch finer if the crema is thin.
Why is my AeroPress coffee lacking a thick crema layer?
The most common causes are stale beans, water that's too cool, and plunging too fast. Carbon dioxide escapes from beans within a few weeks of roasting, so fresh beans produce more foam. Water should be between 195°F and 205°F. Press slowly and steadily, and try the inverted method to extend steep time. If you're still getting nothing, your grind is probably too coarse.
